
GitLab之CI_CD配置
wiki信息
- 创建时间: 2020-12-17
- 最近修改时间: 2020-12-17
- 当前版本:v1.0.1
- wiki作者: 向波任(C3005579)
- 联系电话: 5073+66948
- 联系邮箱:mcebg-mac1-miscdsys2@mail.foxconn.com
本地测试成功的流程步骤(Win10开发机上架设虚拟机)
- 安装VirtualBox虚拟机,并在虚拟机中安装CentOS 7操作系统
- 设置VirtualBox虚拟机中的CentOS 7的网络为桥接模式,并配置CentOS7中的内网代理
- CentOS中安装GitLab,设置配置文件,并启动
- Win10中安装GitLab-Runner,并和GitLab进行交互式注册
- Tomcat配置只有manager-script角色的用户
- 创建Maven项目并在项目根目录下创建.gtilab-ci.yml,并针对该项目进行配置PowerShell脚本
- GitLab中创建项目,开发者push项目源码到GitLab中,Windows服务器的GitLab-Runner自动部署项目到Tomcat
生产环境流程步骤(基于物理机环境,非Docker容器)
- 准备三台电脑:1台GitLab服务器(CentOS 7),1台Tomcat服务器(Windows 10), 1台开发者电脑
- GitLab服务器环境配置
- 安装VirtualBox (如果服务器是Windows操作系统才安装)
- 安装CentOS7, 设置静态IP, 配置内网代理(如果是在VirtualBox中,需要设置为桥接模式)
- 安装GitLab, 配置IP,并启动
- Tomcat服务器环境配置
- 安装JDK1.8,并配置环境变量
- 安装Maven,并配置环境变量,配置内网代理
- 安装Tomcat,并配置manager-script角色的用户,conf/Catalina/localhost/中创建并配置manager.xml
- 安装GitLab-Runner,并和GitLab进行交互式注册
- 开发者电脑环境配置
- 安装JDK1.8,并配置环境变量
- 安装Maven,并配置环境变量,配置内网代理
- 安装Git
- 创建基于Maven结构的JavaWeb项目(例如:SpringBoot项目),并在项目中创建.gitlab-ci.yml,将相应的Maven打包命令和PowerShell脚本写入其中
- 使用Git将项目代码push到GitLab上去,Tomcat服务器上的GitLab-Runner就自动执行构建项目并部署到Tomcat中去了
具体操作
安装VirtualBox
- 下载VirtualBox,网址:Download VirtualBox
- 将下载好的VirtualBox安装在指定文件夹下
安装CentOS7
- 下载CentOS7,网址:CentOS Linux 直接下载网址:CentOS-7-x86_64-Everything-2009.iso
- VirtualBox下安装CentOS7
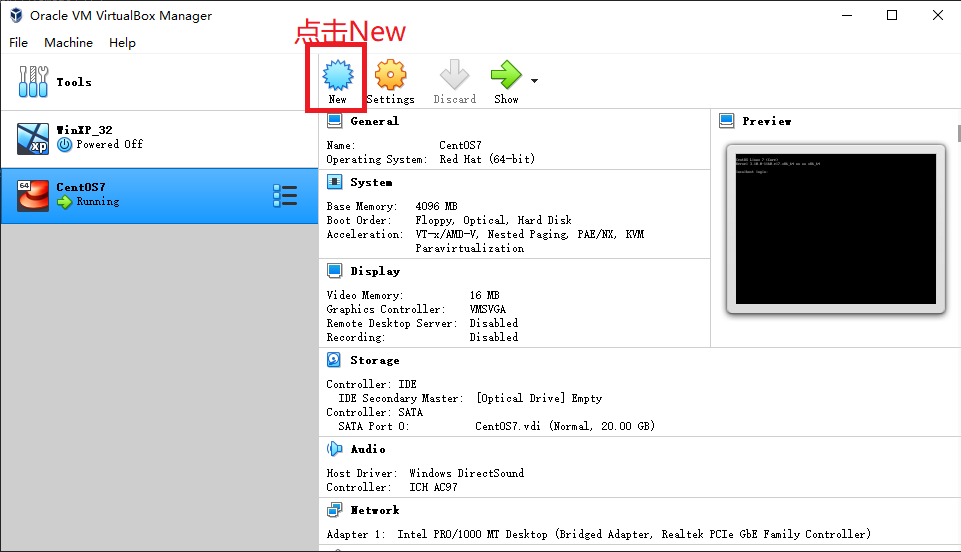
点击New
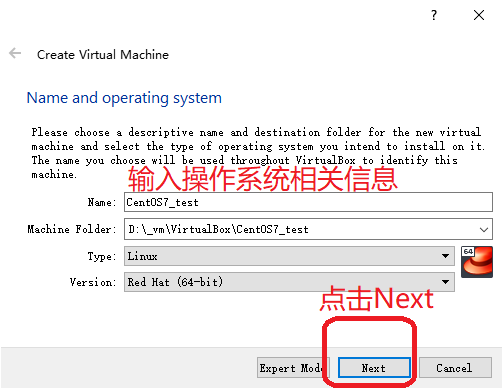
输入操作系统相关信息,并点击Next
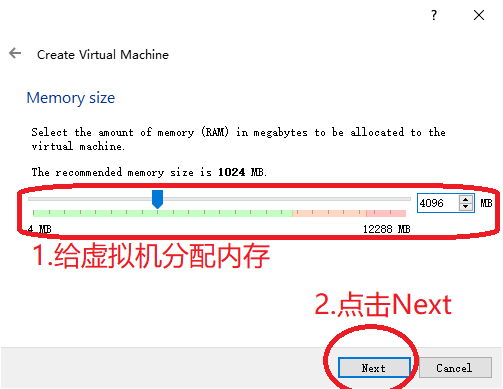
给虚拟机分配内存
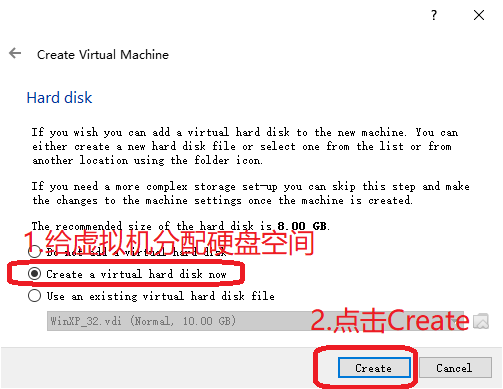
给虚拟机分配硬盘空间
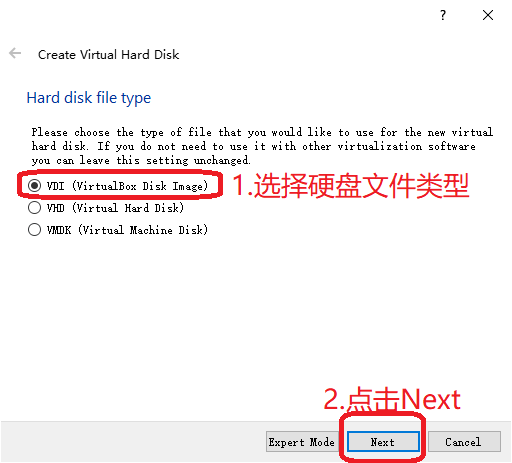
选择硬盘文件类型
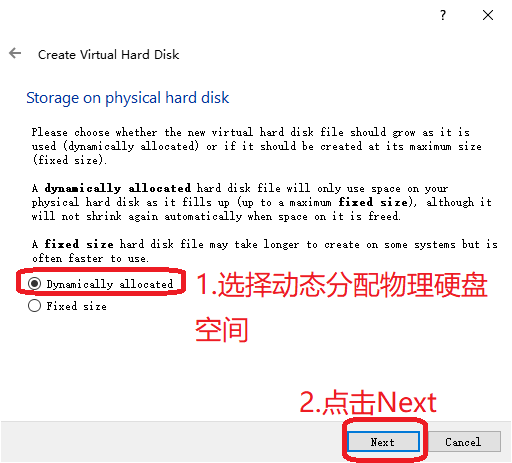
选择动态分配物理硬盘空间
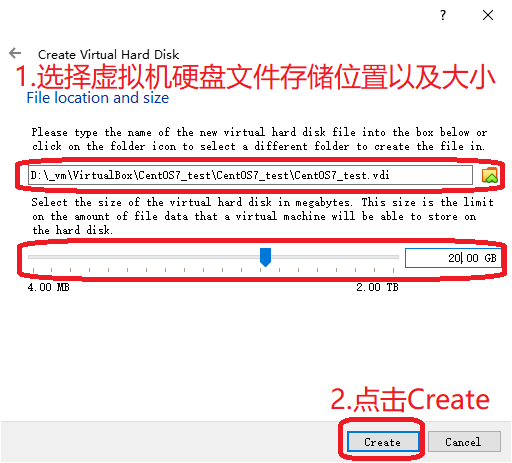
选择虚拟机硬盘文件存储位置以及大小
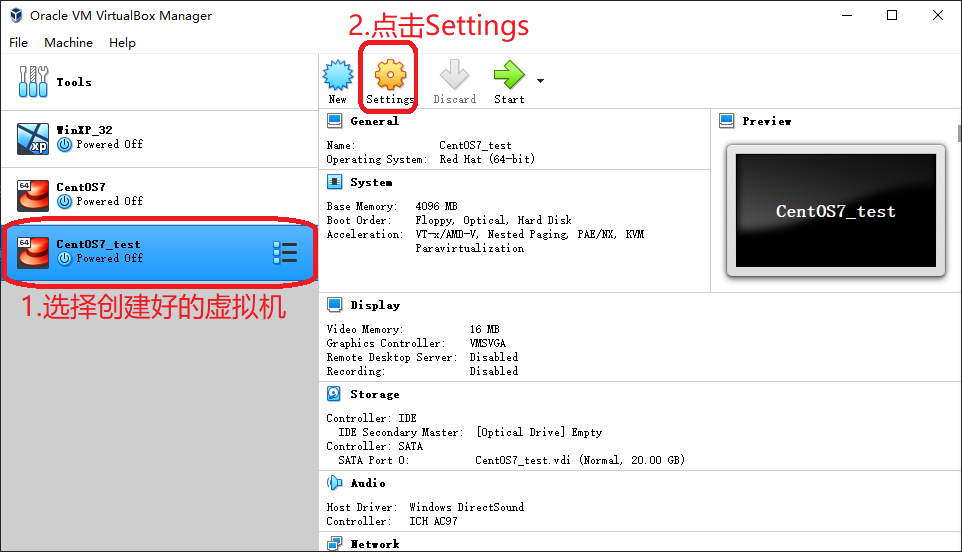
选择创建好的虚拟机
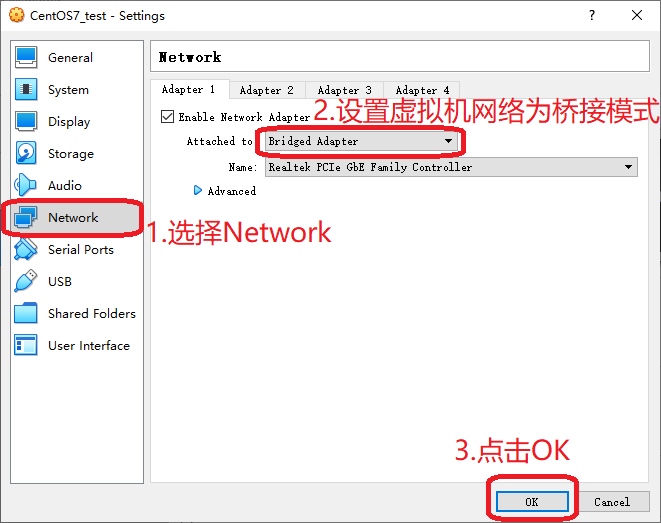
设置虚拟机网络为桥接模式
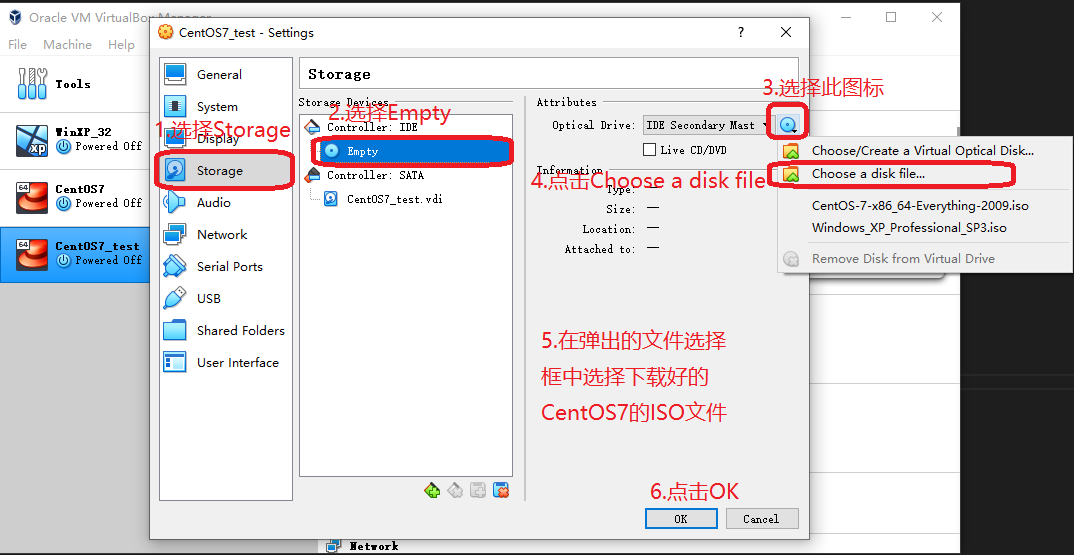
设置系统启动盘用来安装操作系统的ISO文件
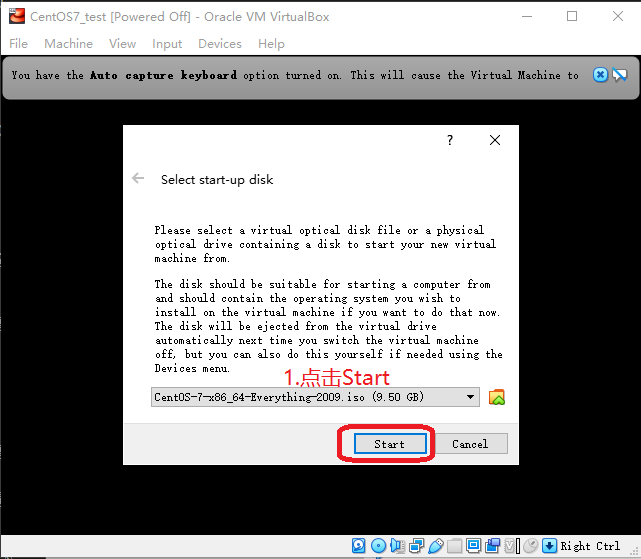
点击Start启动虚拟机

点击Start
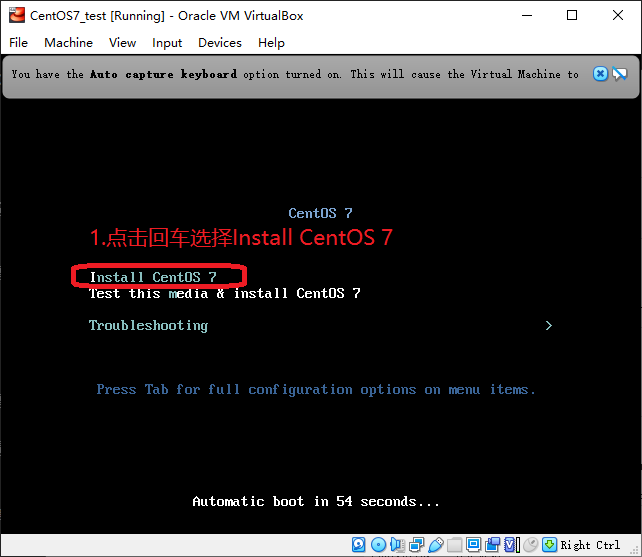
选择安装CentOS7
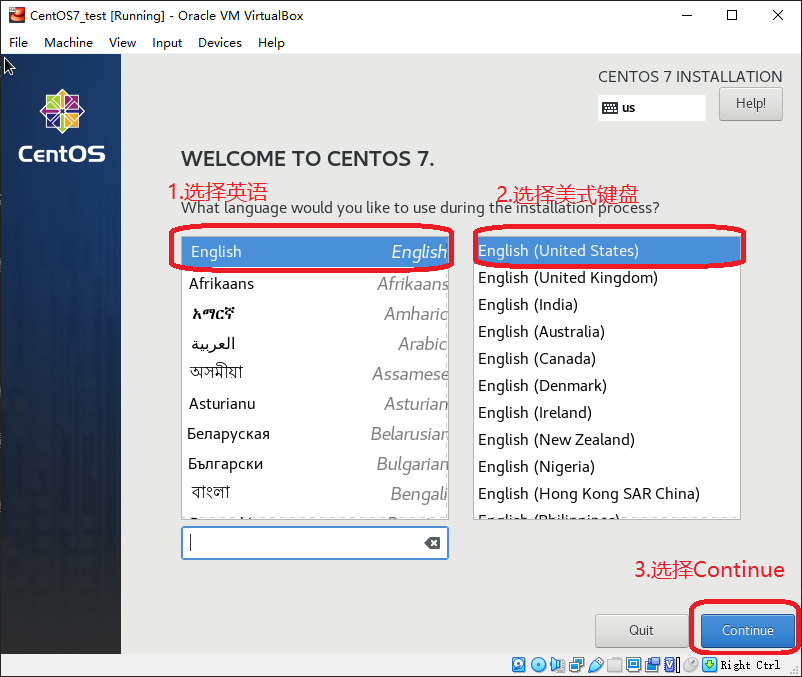
选择英语和美式键盘
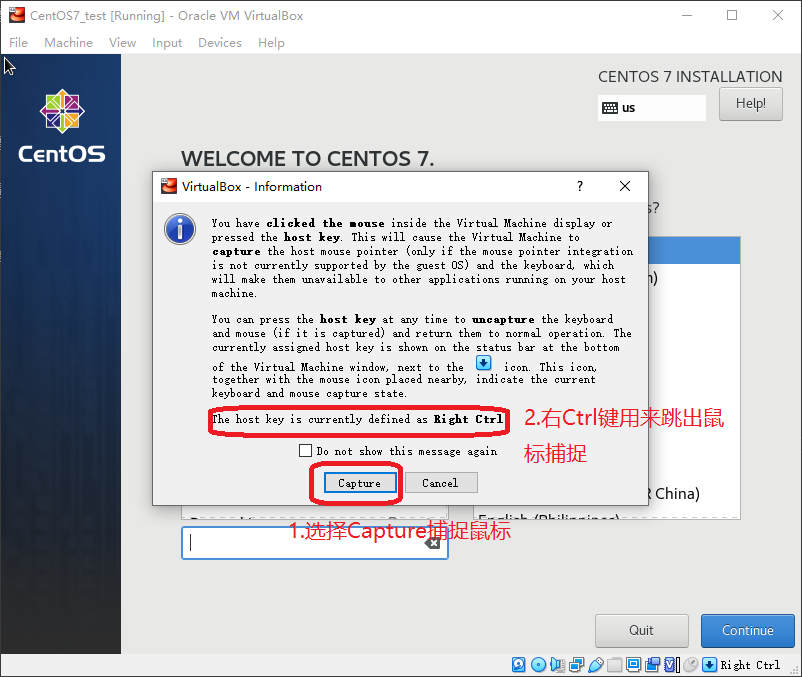
选择Capture捕捉鼠标
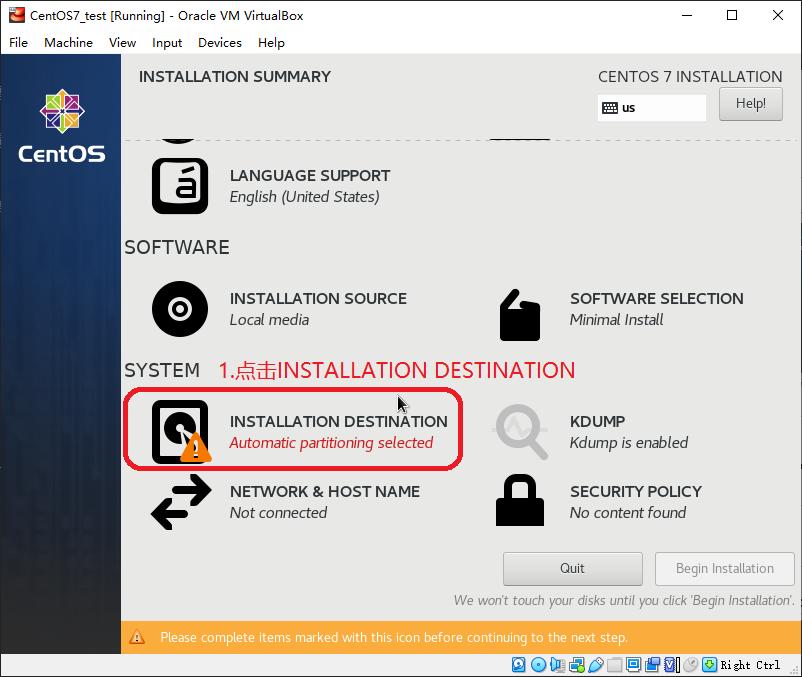
点击CentOS7的安装位置
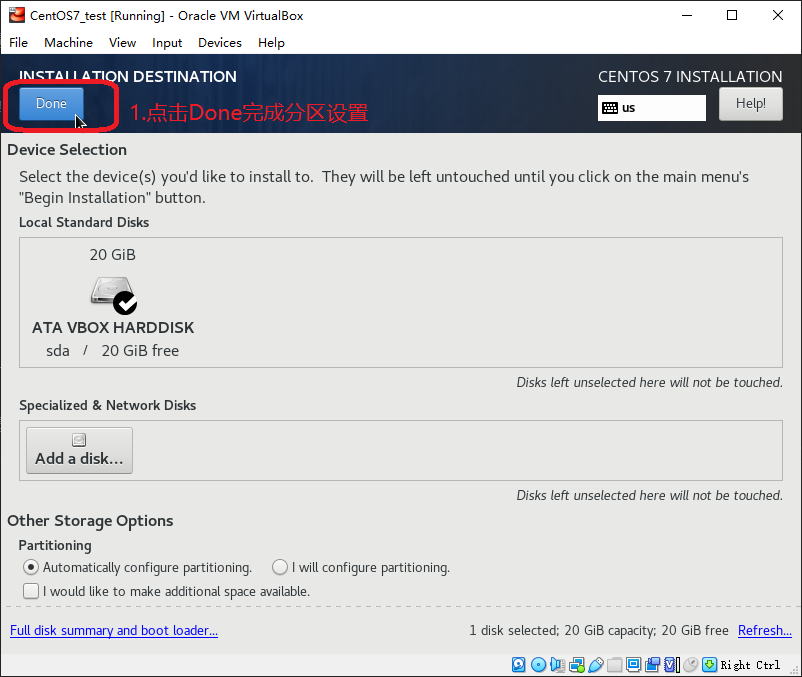
点击Done完成分区设置
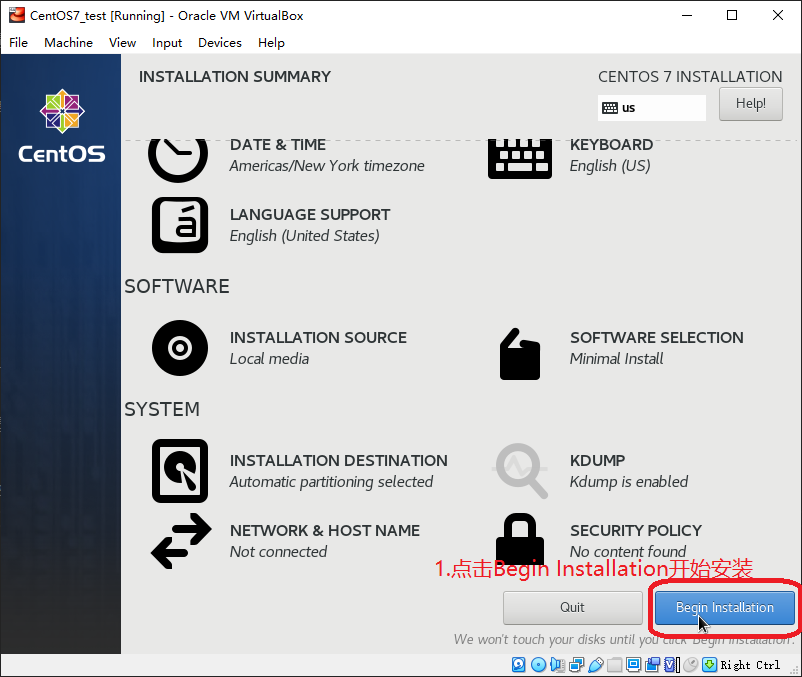
点击BeginInstallation开始安装
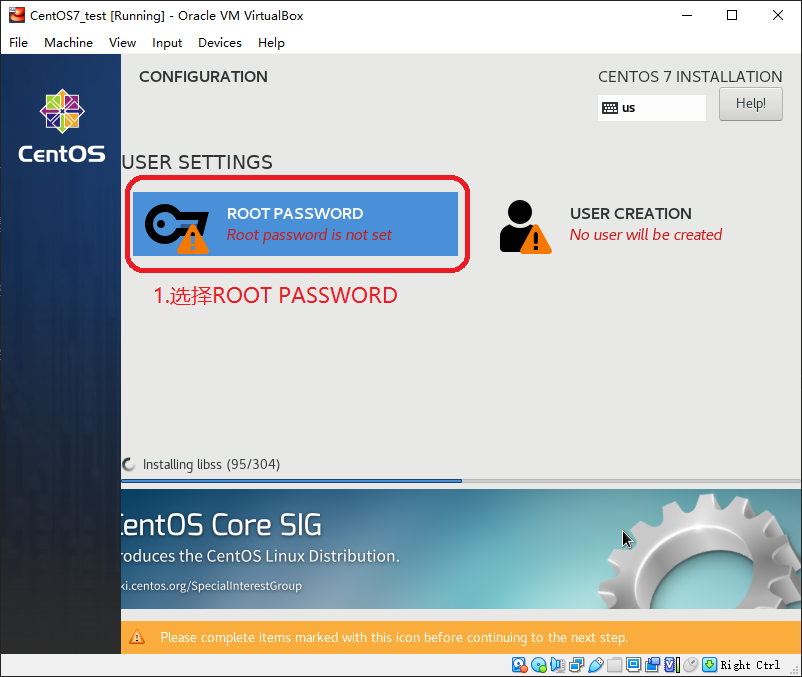
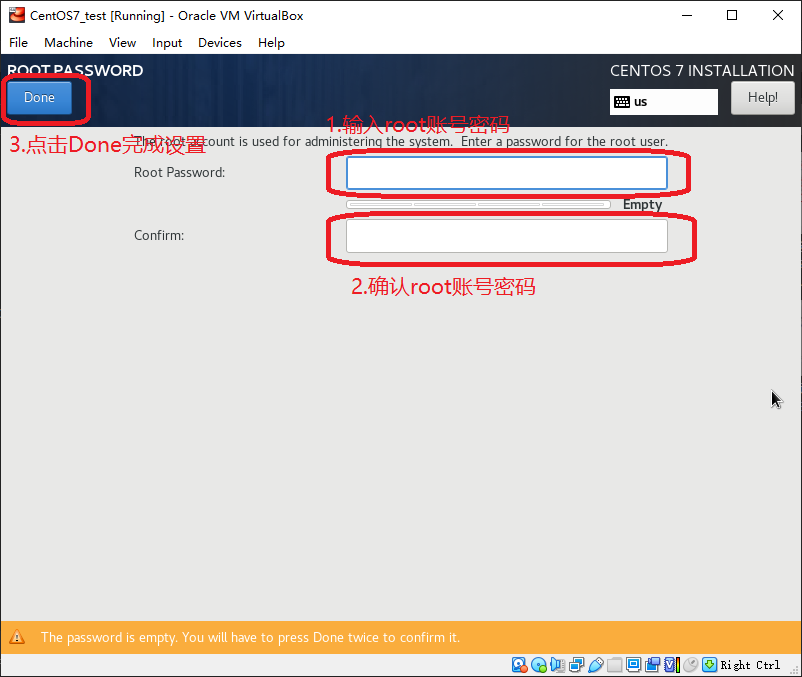
设置root账号密码
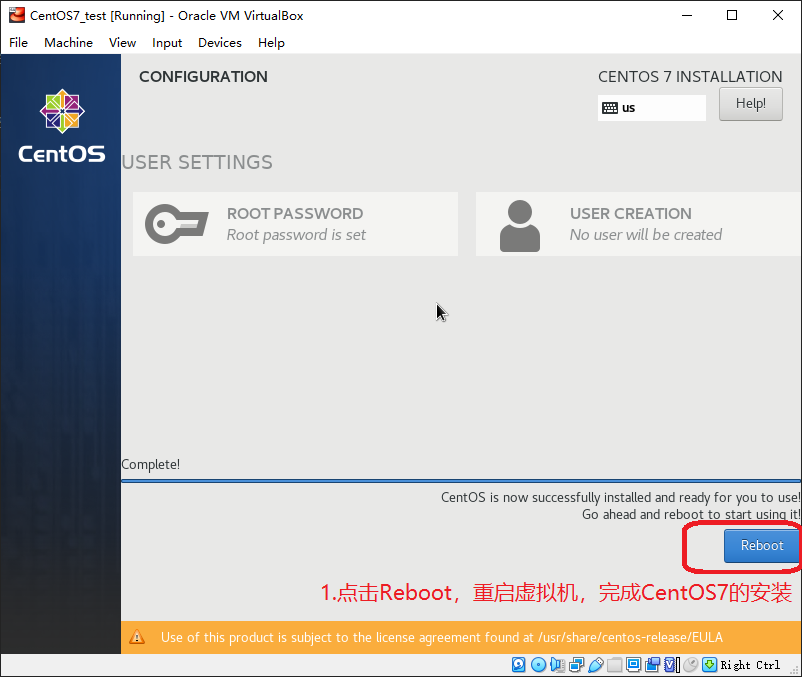
点击Reboot重启虚拟机,完成CentOS7的安装
设置CentOS7
配置静态IP
虚拟机重启后,用root账号登录
设置静态IP,bash命令如下
1
2
3
$ cd /etc/sysconfig/network-scripts
$ ls
$ vi ifcfg-enp0s3进入vi后,点击i键进入Insert模式,修改ifcfg-enp0s3中的内容如下:
1
2
3
4
5
6
7
BOOTPROTO=static # 将默认的dhcp改为static
ONBOOT=yes # 将默认的no改为yes
# 以下是新增的内容
IPADDR=10.244.186.85
NETMASK=255.255.255.0
GATEWAY=10.244.186.1修改完成后,点击Esc推出Insert模式,然后输入 :wq 用来退出vi
重置网络配置
1
$ service network restart
查看网络配置
1
$ ip addr
CentOS7的静态IP配置完成
安装远程连接工具
安装WinSCP WinSCP官网地址 ,WinSCP下载地址
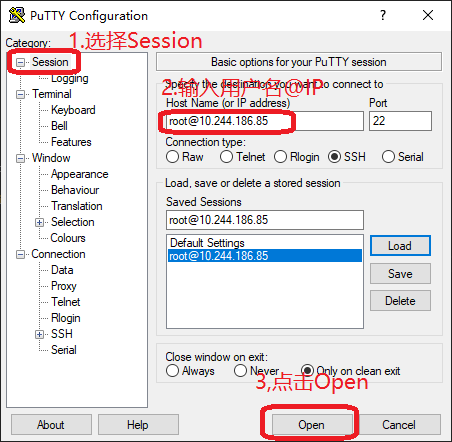
使用PuTTY通过SSH访问CentOS7
使用WinSCP通过SFTP访问CentOS7

设置网络代理
- profile设置代理
编辑/etc/profile
1 | $ vi /etc/profile |
profile中添加以下信息
1 | http_proxy=http://10.244.186.81:8088/ |
生效配置
1 | $ source /etc/profile |
- yum设置代理
编辑/etc/yum.conf
1 | $ vi /etc/yum.conf |
yum.conf中添加以下信息
1 | proxy=http://10.244.186.81:8088/ |
编辑/root/.bashrc
1 | $ vi /root/.bashrc |
.bashrc中添加以下信息
1 | export http_proxy="http://10.244.186.81:8088/" |
- wget设置代理
编辑/etc/wgetrc
1 | $ vi /etc/wgetrc |
wgetrc中添加以下信息
1 | http_proxy=http://10.244.186.81:8088/ |
- 重启服务器
1 | $ reboot |
安装GitLab
- 查看CentOS 版本信息
1 | $ cat /etc/centos-release |
- 查看IP地址
1 | ip addr |
- 安装依赖
1 | $ yum install curl policycoreutils-python openssh-server deltarpm -y |
- 查看防火墙放行列表
1 | $ firewall-cmd --list-all |
- 防火墙放行80,443端口
1 | $ firewall-cmd --zone=public --add-port=80/tcp --permanent |
- 重启防火墙
1 | $ firewall-cmd --reload |
新增GitLab的国内清华大学的yum源
- 清华大学YUM源地址 https://mirrors.tuna.tsinghua.edu.cn/gitlab-ce/yum/el7/
- 清华大学GitLab Community Edition 镜像使用帮助 https://mirrors.tuna.tsinghua.edu.cn/help/gitlab-ce/
新建/etc/yum.repos.d/gitlab-ce.repo, 内容如下
1 | [gitlab-ce] |
- 添加命令
1 | $ vi /etc/yum.repos.d/gitlab-ce.repo |
- 查找yum源中gitlab-ce的版本
1 | $ yum list gitlab-ce --showduplicates|tail -n 30|head |
- 选择安装版本(2020-12-17当前最新版本为13.3.7-ce.0.el7)
1 | $ yum install gitlab-ce-13.3.7 -y |
- 查看Gitlab版本
1 | $ cat /opt/gitlab/embedded/service/gitlab-rails/VERSION |
- 配置GitLab配置文件/etc/gitlab/gitlab.rb
1 | $ vi /ect/gitlab/gitlab.rb |
修改以下内容
1 | # 将原来的 external_url 'http://gitlab.example.com' 修改为以下内容 |
- 加载Gitlab的配置
1 | $ gitlab-ctl reconfigure |
当最后出现 gitlab Reconfigured 表明配置成功
- 启动Gitlab
1 | $ systemctl start gitlab-runsvdir |
访问 http://10.244.186.85 提示输入密码, 这里输入的是root账号的密码,切记不要乱输,不然就只有通过修改数据库的数据来修改root账号的密码了
注册一个非root账号登录,用来创建项目
安装JDK1.8
- 过程略
安装Maven
- 过程略
安装Tomcat
安装过程略
在conf/Catalina/localhost/文件夹下创建manager.xml,内容如下
1 |
|
- 配置manager-script角色的用户,在conf/tomcat-users.xml中添加以下内容:
1 | <role rolename="manager-script"/> |
安装GitLab-Runner
Windows 10 操作系统下载GitLab-Runner, windows下Gitlab Runner官网地址, 直接下载地址
将下载好的gitlab-runner-windows-amd64.exe改为gitlab-runner.exe
在gitlab-runner.exe文件夹下打开cmd,输入以下命令,进入交互式注册
1 | $ ./gitlab-runner.exe register |
- 交互式注册如下
1 | 1.Enter the GitLab instance URL (for example, https://gitlab.com/): |
- 安装gitlab-runner
1 | $ ./gitlab-runner.exe install |
- 启动gitlab-runner,到此gitlab-runner就安装启动成功了
1 | $ ./gitlab-runner.exe start |
- 停止gitlab-runner(当需要停止时才使用)
1 | $ ./gitlab-runner.exe stop |
- 卸载gitlab-runner(当需要卸载时才使用)
1 | $ ./gitlab-runner.exe uninstall |
安装Git
- 过程略
创建SpringBoot项目
过程略
项目中添加.gitlab-ci.yml文件,内容如下:
1 | build1: |
使用Git将代码push到GitLab
- 过程略
- 本文标题:GitLab之CI_CD配置
- 本文作者:Xplorist
- 创建时间:2020-12-16 09:04:00
- 本文链接:https://xplorist.tech/2020/12/16/e6bbdf76baed/
- 版权声明:本博客所有文章除特别声明外,均采用 BY-NC-SA 许可协议。转载请注明出处!